OpenStack using MiniStack Installation in Ubuntu
Build your Own private cloud with OpenStack using MiniStack Installation in Ubuntu
In This article we will be discussing about the installation of OpenStack using MiniStack in Ubuntu. But let’s first understand what is OpenStack and MiniStack.
What is OpenStack?
OpenStack is an open-source cloud computing platform that allows you to build and manage private and public clouds. It provides a set of services for managing compute, storage, and networking resources, making it easier to deploy and scale applications in a cloud environment.
What is MiniStack?
MiniStack, on the other hand, is a lightweight version of OpenStack that is specifically designed for development and testing purposes. It allows you to run a simplified version of OpenStack on your local machine, making it easier to experiment with OpenStack features and functionalities without the need for a full-scale deployment.
In the context of Ubuntu, you can install and use MiniStack to set up a local OpenStack environment on your Ubuntu machine. This enables you to simulate and test various cloud scenarios, such as creating virtual machines, managing networks, and deploying applications, all within the comfort of your development environment.
By using MiniStack in Ubuntu, you can gain hands-on experience with OpenStack and explore its capabilities without the need for dedicated hardware or complex setup procedures. It provides a convenient way to learn, develop, and experiment with OpenStack, making it an ideal choice for developers and enthusiasts interested in cloud computing.
Installation of MiniStack in Ubuntu
To install MiniStack in Ubuntu, Make sure you meet the requirements and follow the installation steps below.
Requirements
- Ubuntu 18.04 or later
- 4GB of RAM
- 20GB of disk space
- Python 3.6 or later
- snapd package manager
Installation Steps
installing OpenStack using MiniStack in Ubuntu is a straightforward process that involves a few simple steps. Here’s a step-by-step guide to help you get started:
if you have installed snapd package manager, you can skip the first step.
just type the following command in your terminal to install snapd package manager.
sudo apt update
sudo apt install snapd
if your system does not have snapd package manager installed, you can refer this link to install snapd package manager in your system. https://snapcraft.io/docs/installing-snapd
Once you have snapd package manager installed, you can proceed with the installation of MiniStack by running the following command in your terminal:
sudo snap install microstack --beta
after installing microstack check the version to verify if the microstack is installed properly by typing this command
microstack.openstack --version
it should return something like this

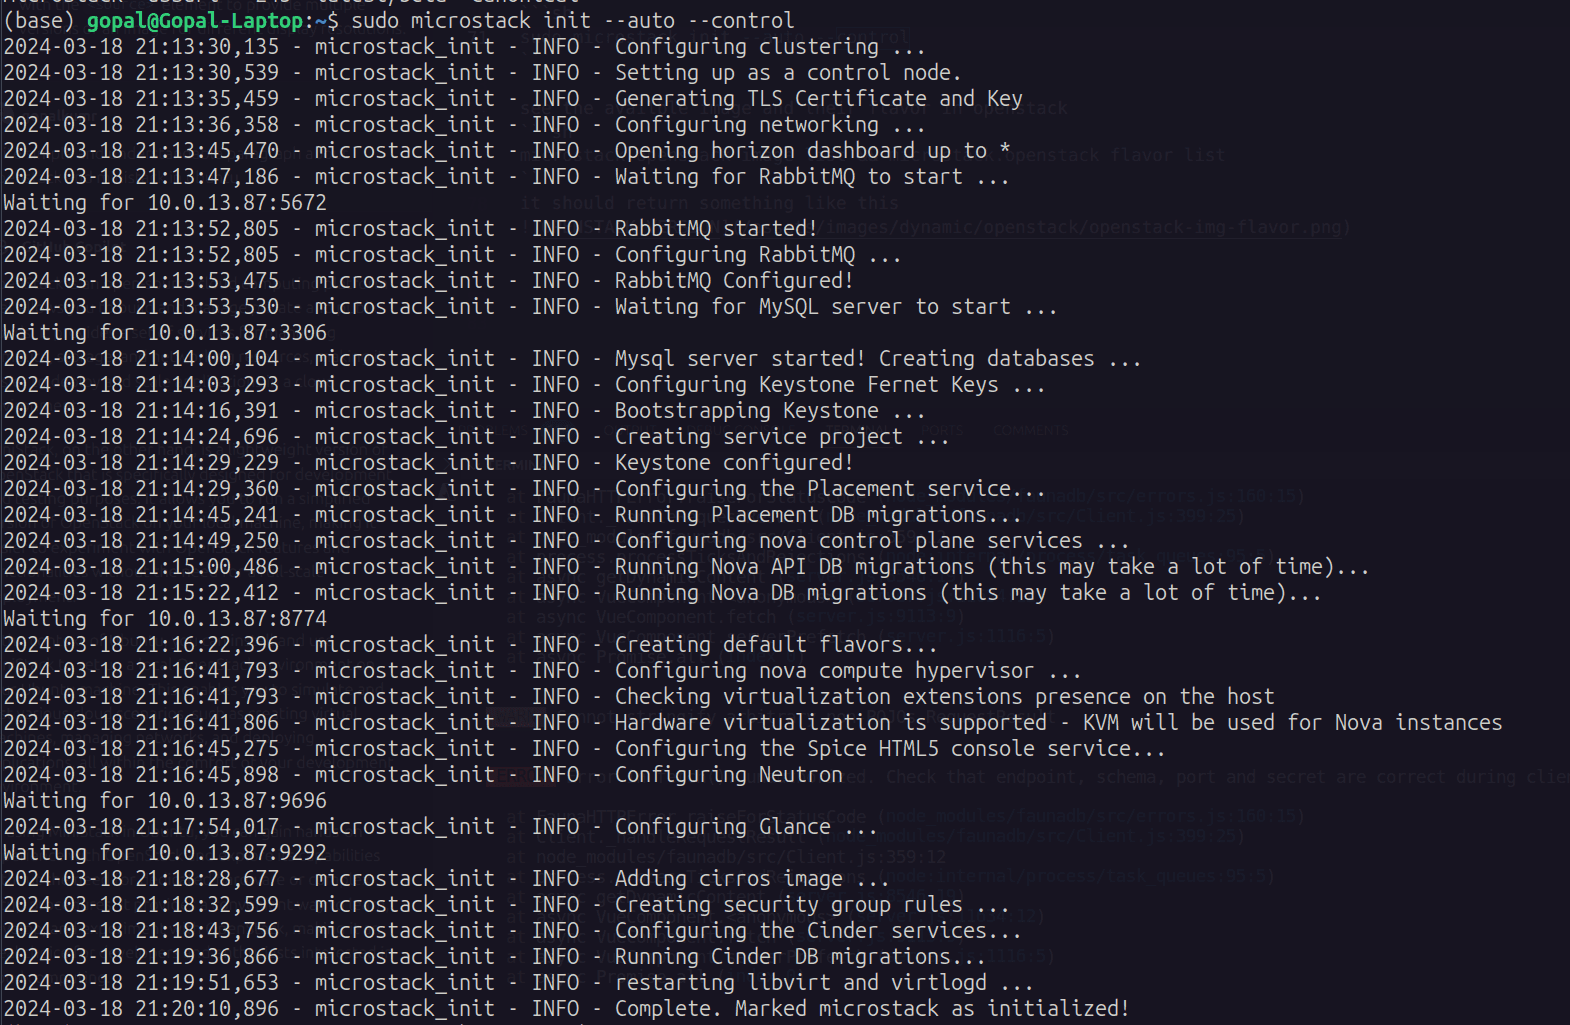
Once the installation completed, You can directly run this command to install Openstack in your ubuntu
sudo microstack init --auto --control
if this command executed successfully it should look like this
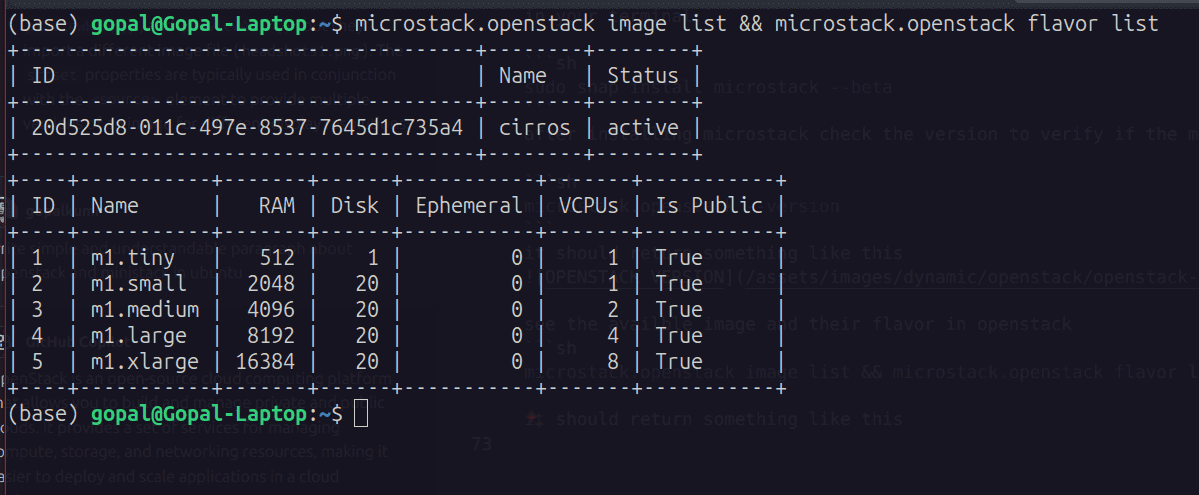
see the availble image and their flavor in openstack
microstack.openstack image list && microstack.openstack flavor list
it should return something like this
Now OpenStack is installed in your system but inorder to login you need to login. hence it required Username and password.
As per the configuration the username is ‘admin’ and password you have to obtain using following methid
sudo snap get microstack config.credentials.keystone-password
it should look something like this

once you get the password, it’s time to login into openstack.
to login you need your system ip address, if you don’t know ip address ip adress of your system just open terminal and type the following command
ip addr
the output should look like this
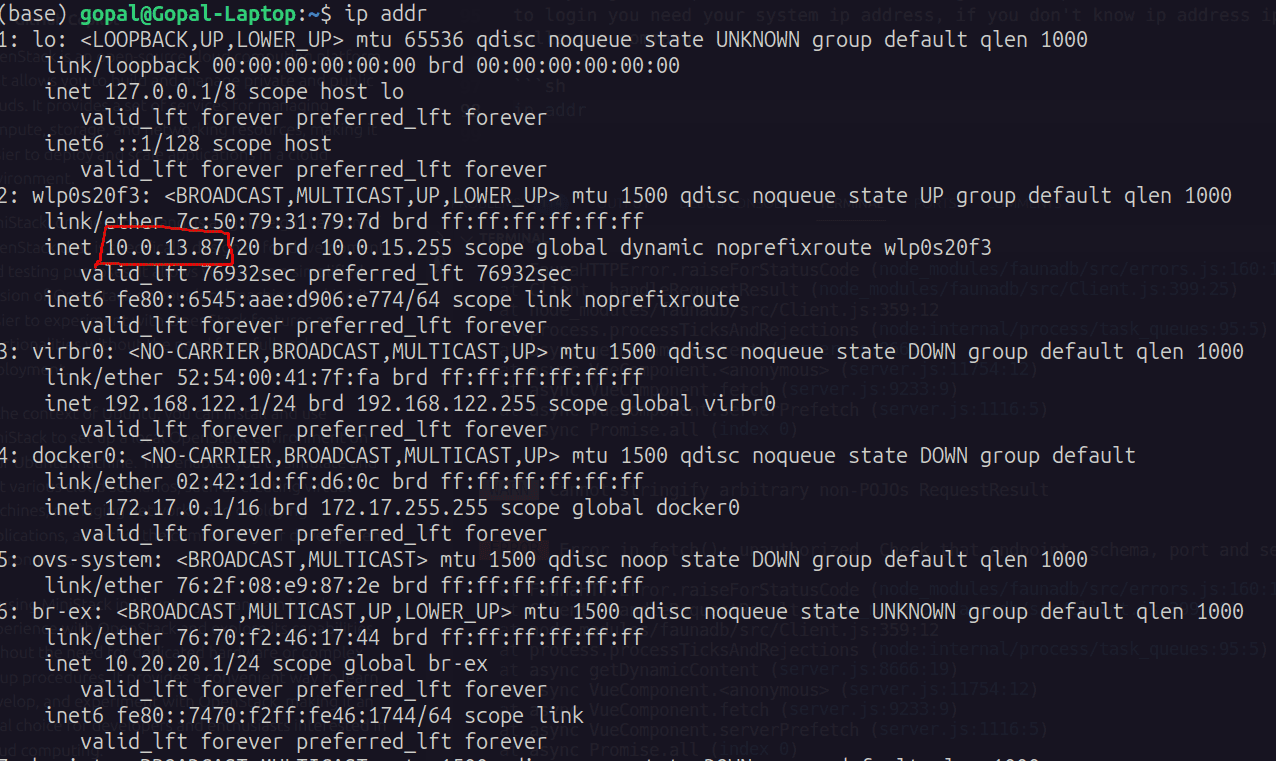
Now you have the ip address of your system, you can use this ip address to login into openstack. you can go to your browser and type the following url to login into openstack
http://<your-ip-address>/auth/login/
or
http://localhost/auth/login/
the page should look like this

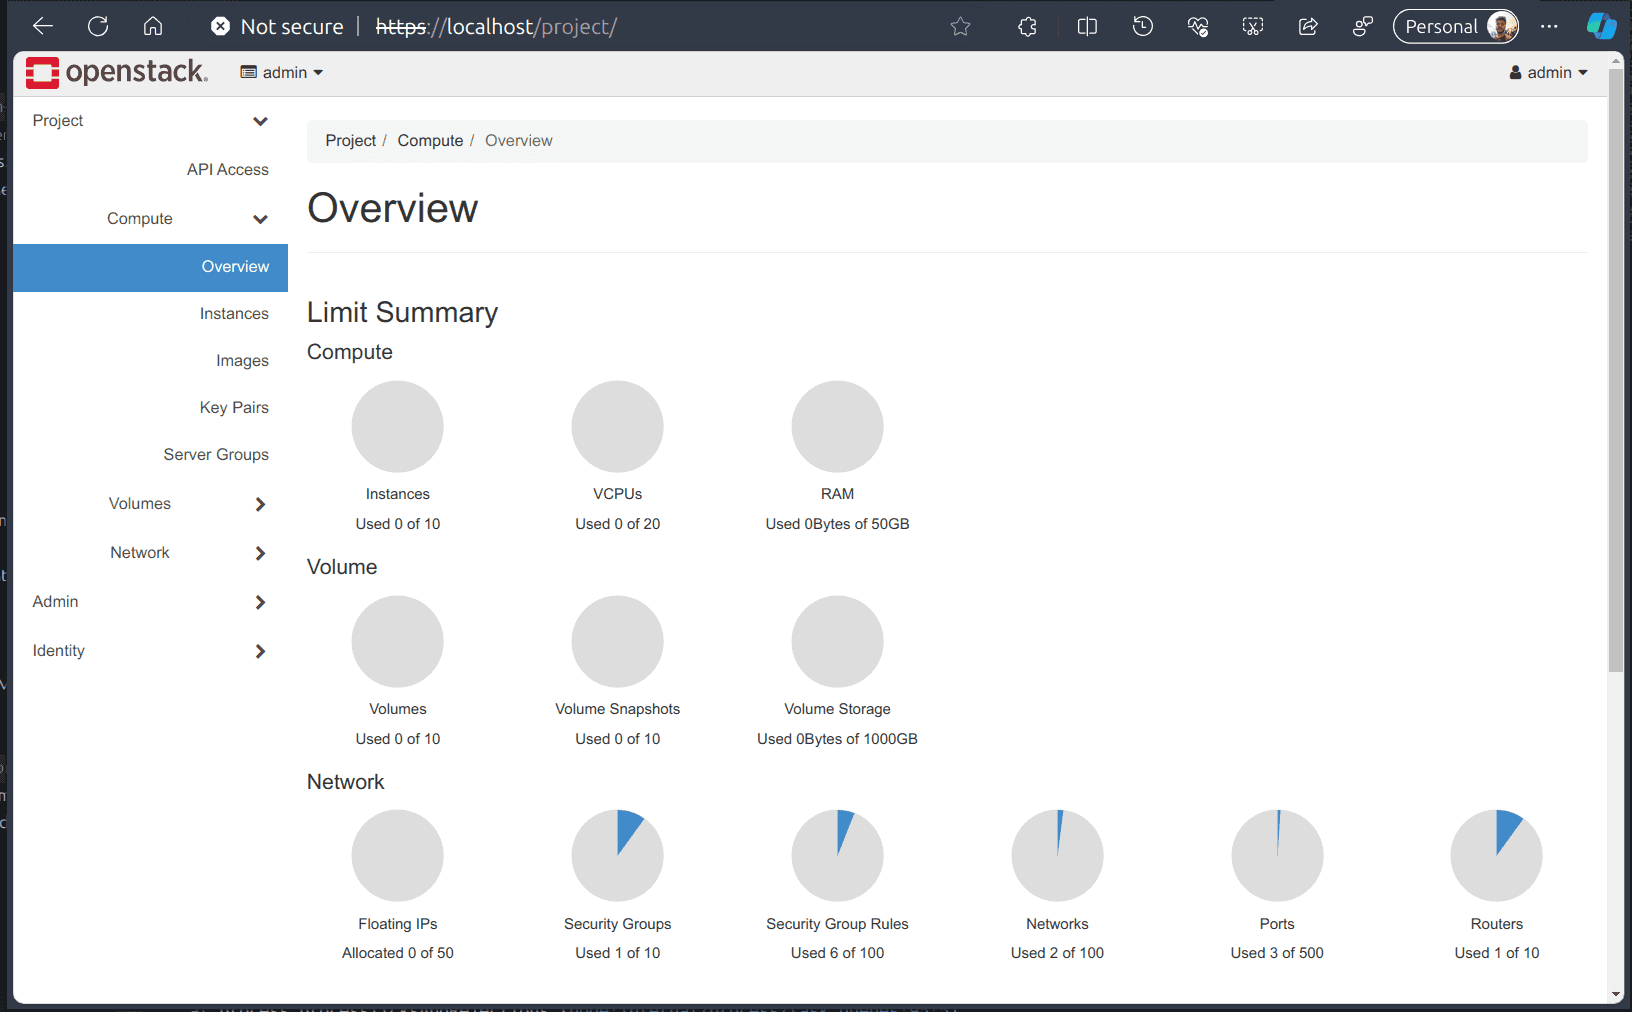
Now you can use the username and password to login into openstack. once you login you can see the dashboard of openstack. it should look like this
The short summary of command you can type is
sudo snap install microstack --beta
sudo microstack init --auto --control
sudo snap get microstack config.credentials.keystone-password
go to
http://localhost/auth/login/
username: admin
password: password you got from command
you can use following commmand to stop the microstack to avoid the memory consumption when not in use.
sudo snap disable microstack
and you can restart the microstack using following command
sudo snap enable microstack
This Blog is being updated. Please Pardon if you find any mistake or report us at gopalkumargupta337@gmail.com
Last Updated 10:59 19th March 2024
0 comments